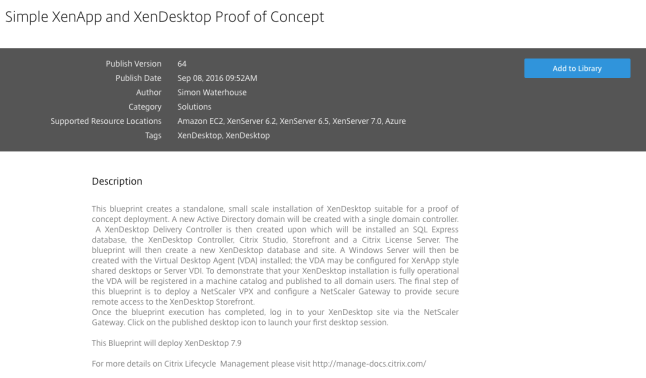
Part 1 – using Blueprints to deploy a new Citrix XenApp/XenDesktop 7.x Site into Azure.
Part 2 – using Citrix Lifecycle Management to automatically migrate your XenApp 6.5 Farm to your newly deployed XenApp 7.x Site.
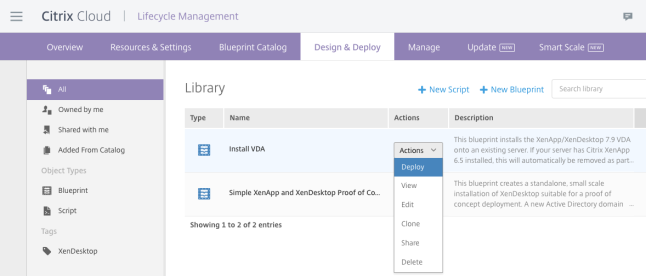
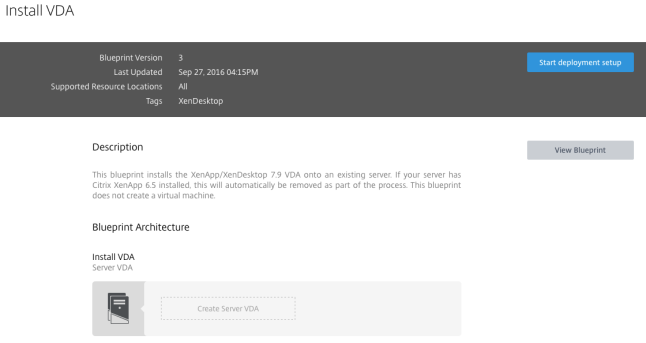
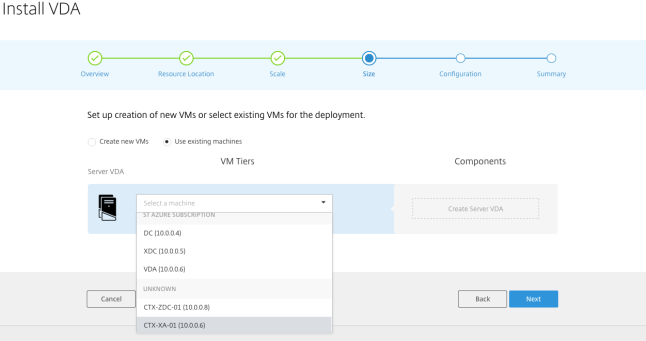
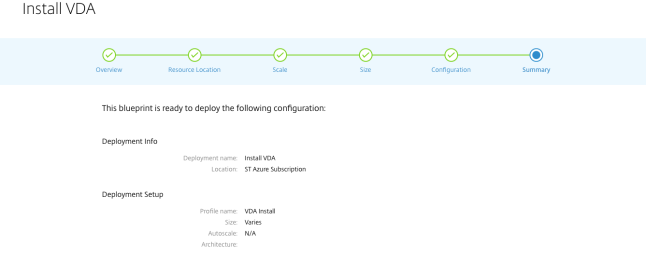
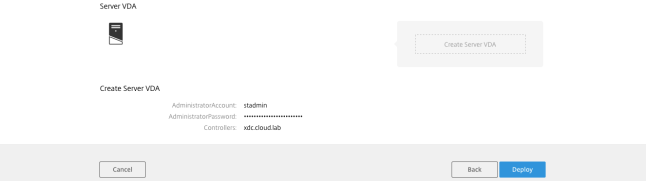
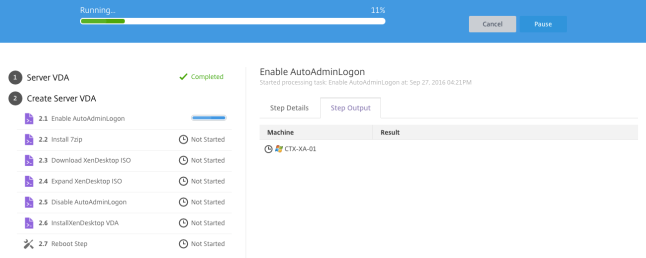
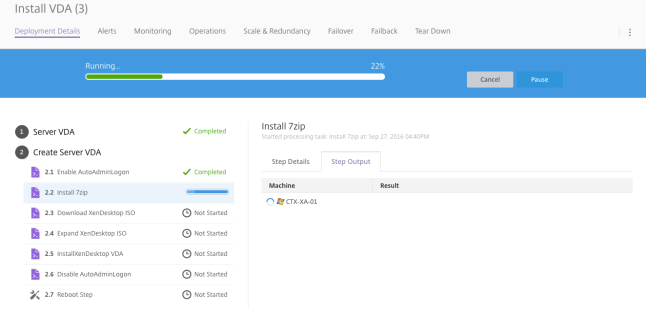
Part 3 – using a customised Blueprint to install the XenApp 7.x VDA onto an existing XenApp 6.5 server.
Part 4 – using Citrix Lifecycle Management Smart Scale to intelligently control your cloud-hosted workloads so that you only have the amount of resources up and running in the cloud that you are using.
Part 5 – using Citrix Lifecycle Management to Upgrade your XenApp 7.x Site to the latest version.
Part 6 – Using the Citrix Cloud Apps & Desktop service to manage your VDA workloads, wherever they are; be it on-premises, cloud-hosted or a hybrid for a fully cloud-managed solution. This solution removes the requirement to deploy the Control Layer, which Citrix will maintain for you. You access an HTML5 version of Studio for management. The only “deployable” components are the VDAs.
Recap…
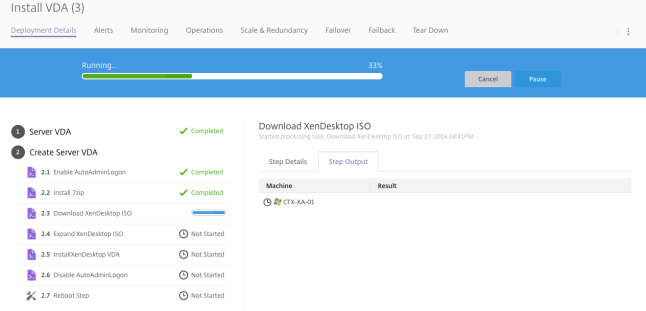
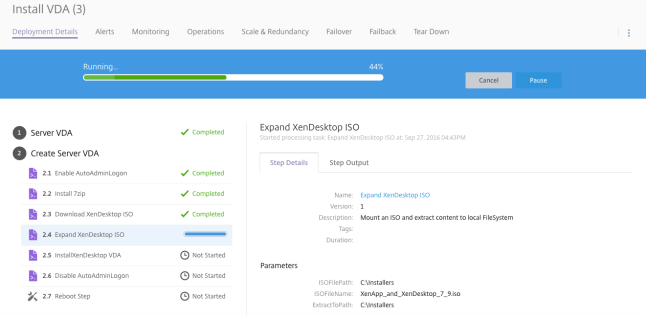
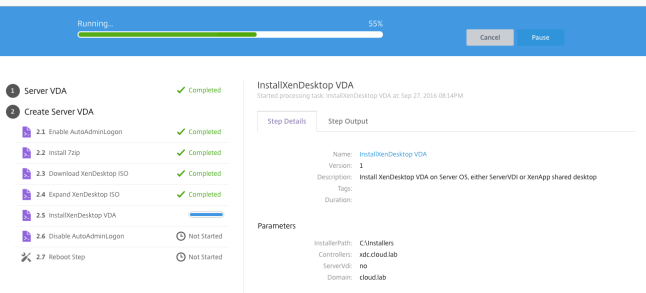
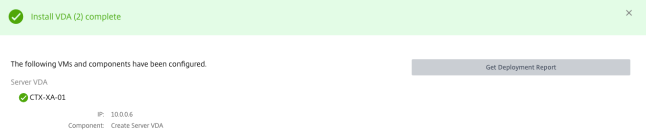
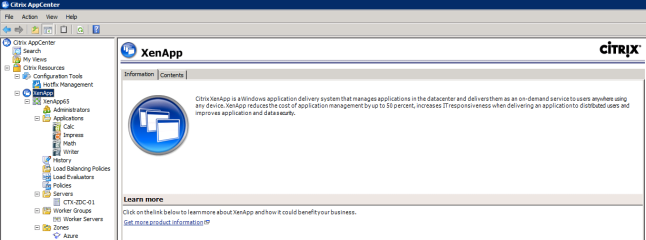
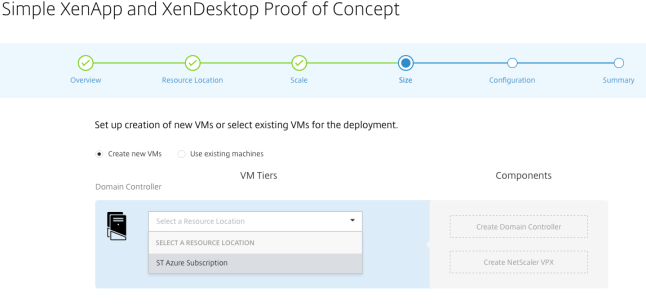
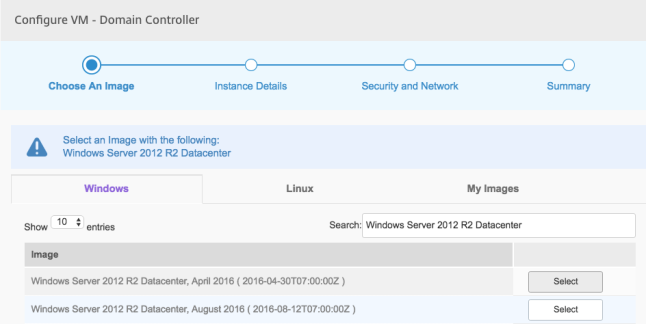
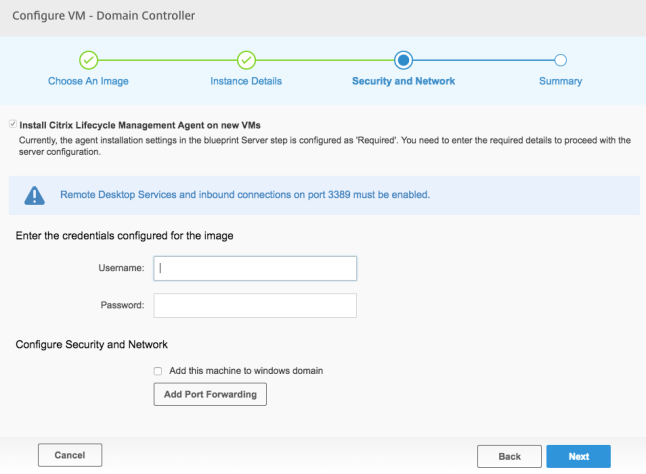
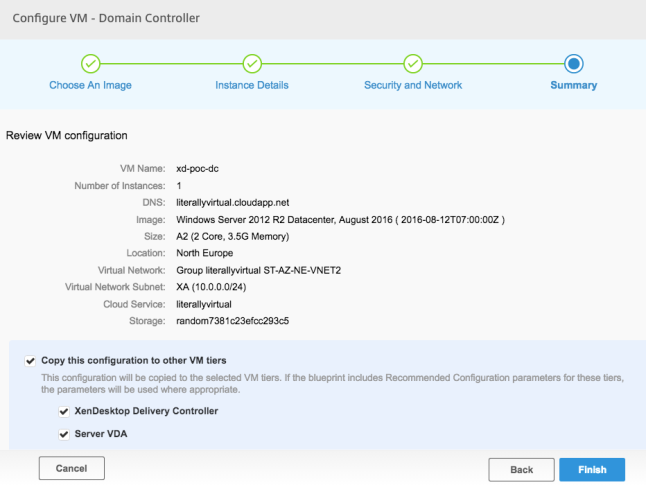
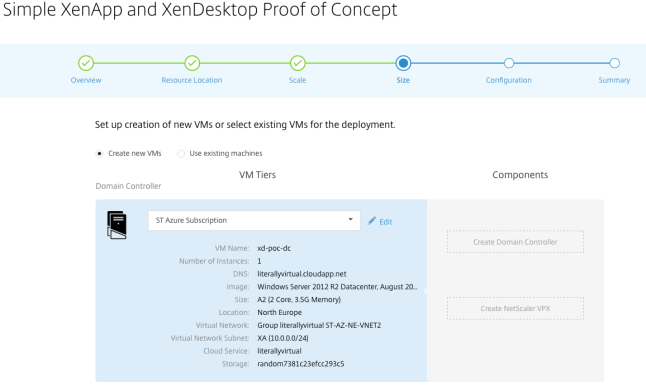
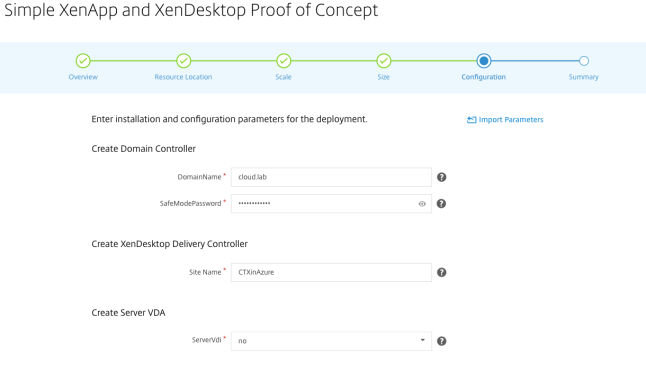
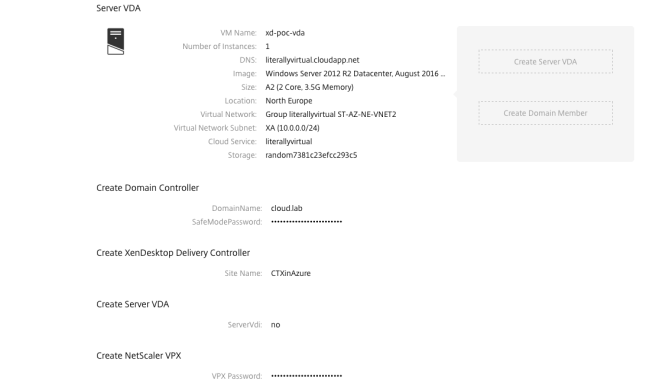
In Parts 1, 2 and 3, we used Lifecycle Management to migrate our XenApp 6.5 to a newly deployed XenApp 7.x environment, complete with configuration, policies and applications. In my case, the new XenApp 7.x environment was in Azure.
Background
As I mentioned above, the biggest cost involved when using Public Clouds is compute costs. The more CPU, memory and disk you want, the more you pay. It’s also the beauty of it. So, let’s take the following example:
After looking at this whitepaper on XenApp 7.11 scalability in Azure, we’ve decided to deploy the D2v2 instances to be our VDAs.
These have a cost of £0.1491 per hour or approximately £110.90 per month, per instance when deployed into the Northern Europe Azure datacentre.
According to LoginVSI, we’re looking at around 15 users per D2v2 instance before performance drops off.
If we wanted to supply published resources for 1000 users, we would then require approx. 67 D2v2 instances, which would have a monthly cost of £7430.30 which sounds like a lot! You could also say that this is £7.43 per user per month which doesn’t sound so bad. However, there are other related costs such as storage and outbound bandwidth used + the licensing to factor in.
But, would you really need 67 instances? And if you did need to cater for all 1000 users at any point, would all of your 1000 users work 24/7? The answer is probably not. Even if you had peaks during the day (or night) where all 1000 users required their published resources, this would probably not be maintained 24/7.
If a user required their resources for 12 hours a day, which still would probably be an over-estimate, then, if you could turn off resources which aren’t needed, you’ve potentially cut your costs from £7430.30 per month to £3715.15 per month or £3.72 per user per month. Wunderbar!
Now, of course these are hypothetical calculations but you can see how you could easily save a lot in Cloud running costs if you can control when your instances are running.
Welcome Smart Scale!
So, with Smart Scale which is a component of Lifecycle Management you can! Using the same Lifecycle Management Agent on your endpoints (VDAs in this instance), you can set up policies to control when you VDAs are powered up and powered down based on either:
- a schedule; say 9am – 5pm
- workload; when either x amount of users are logged on per server or when the load evaluator reaches 10000
- or a mixture of both
How does it work?
For schedule-based policies, by talking to your XenApp/XenDesktop Controller, the VDA will be placed into maintenance mode at the allotted time to stop any further connections. Once all connections are off, the server will be shut down. Likewise, when it is time, the server will start up and be made available for user connections.
For workload based policies, if you reach either reach the designated number of users per server, or a reading of 10000 on your load evaluator, another server will be powered on to increase your capacity. Likewise, as users log off and servers become empty, these servers can be shutdown.
In order to make sure you have VDAs available, you’re able to set a minimum number of VDAs to leave on. So, you may wish to have 10 VDAs available at anyone time knowing that you can instantly server ~150 users (based on our example above).
Show me the Smart Scale!
Ok, enough talking, let’s see it in action! In my example below, I have configured Smart Scale to use both a schedule and server load.
Considerations
There are some considerations when using Smart Scale that I found during my testing:
- If users are active on a server, they will not be logged off and the server will not be shut down. In order to control this, I would recommend putting in some type of timeout for idle and disconnected sessions.
- If using the Load Evaluator index as your metric, you need to set a policy for this within either Studio Policies or Citrix Policies GPO, otherwise it uses the default of 250 users for a full load. I configured mine for 85% CPU and memory to show the server as Full Load.
- It takes a few minutes to pick up changes in workload/user count so take this into your calculations when setting policies – don’t make them too tight otherwise you may not spin up resources fast enough.
Let’s Go!
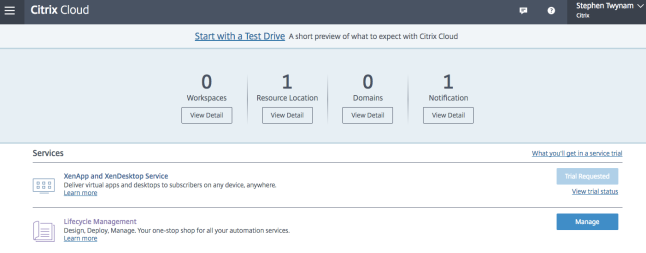
- From your Citrix Cloud login, select Smart Scale (new tab on the RHS)

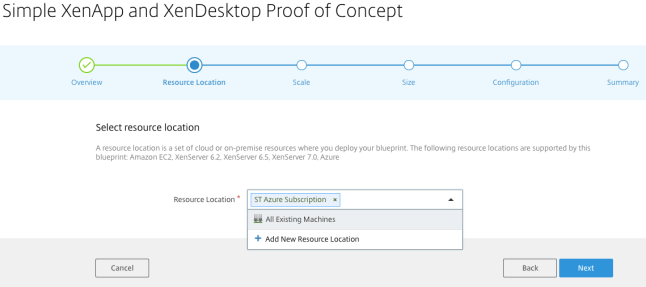
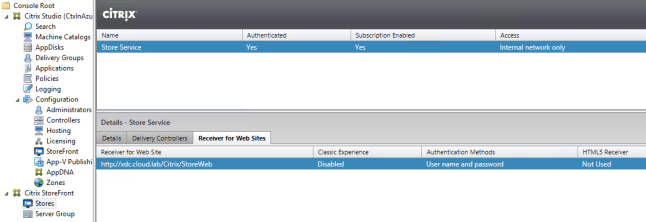
- You will now see the XenApp and XenDesktops Sites that have been registered with Citrix Cloud. This is automatically done for you when you use the Blueprints to deploy a XenApp/XenDesktop environment, whether that be on-prem or in the Cloud. The Site I created during Part 1 is CtxInAzure. Click View Site.
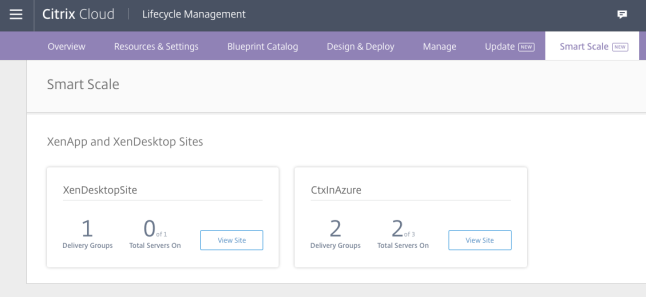
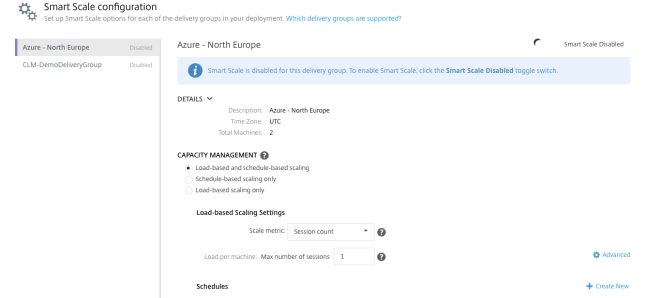
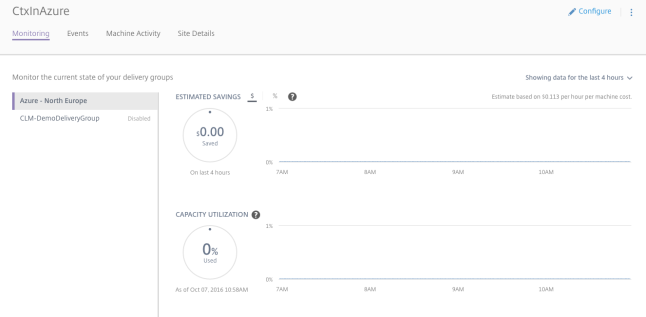
- You will now see the Delivery Groups within your XenApp/XenDesktop Site and the state of Smart Scale. In my case, I have an Azure – North Europe DG with Smart Scale disabled.
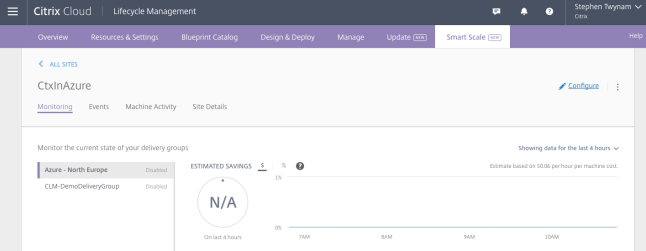
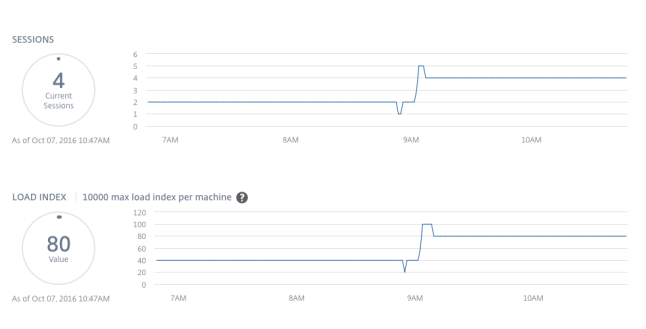
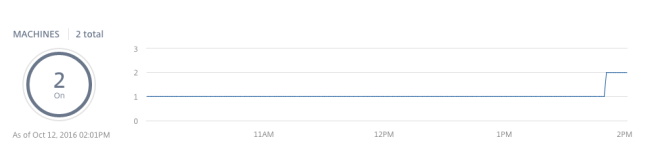
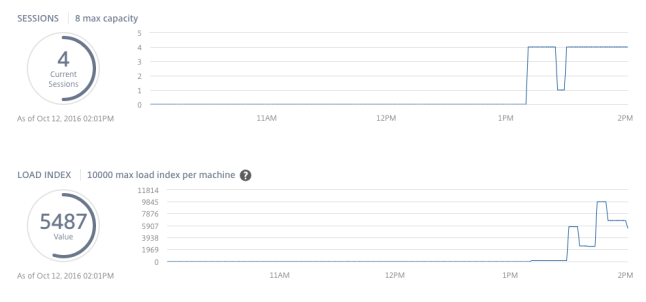
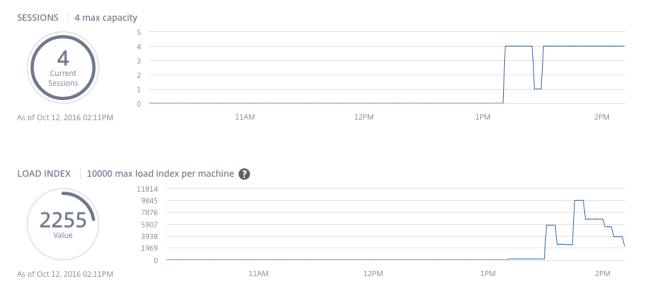
- If you scroll down on the Monitoring page you will get stats such as Estimated Savings (none so far), current sessions and the Load Index. You can also filter these by 2, 4 or 24 hours and the past 7 days.As you can see here, I’ve loaded my 2 VDAs with 4 users. Due to the DEFAULT load evaluator of 250 users per server, the load index is very low and only 80 (max = 10000). As general guidance I would recommend setting your own load evaluator policy based on your environment requirements, which I will be doing shortly.
- At the top of the Smart Scale screen, I’ve clicked on Configure. You’ll now see your options. By default Load-based and schedule-based scaling is selected. I will be using this option.

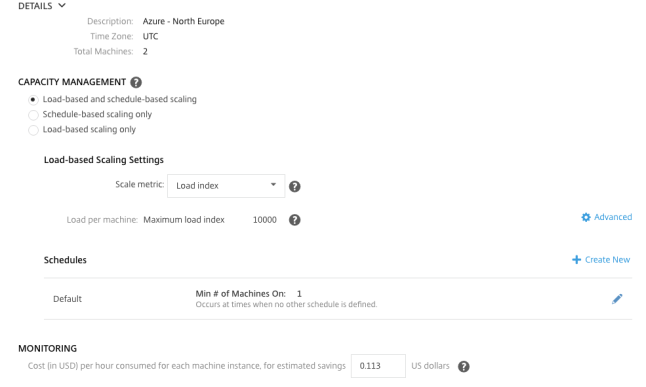
- You’ll see at the bottom, there is an option to set (in US $) the amount per hour of your VMs in the cloud will cost. I’ve amended it from the default $0.06 to $0.113 as I will be running Azure A2 instances for my VDAs. You can find a price list of Windows VMs in Azure here.

- I then changed the Scale Metric to Load Index (defaults to Session Count).
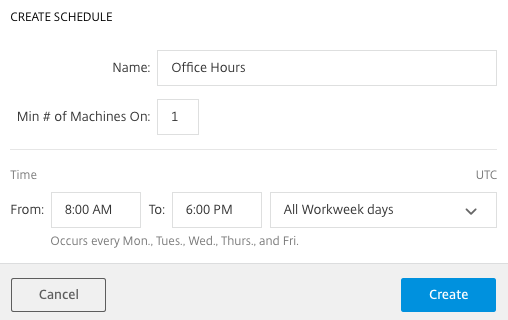
- To configure my own schedule, from the Schedules section I’ve clicked Create New. This will allow me to set when my machines will power on/off and how many machines I want on as a minimum.

- I’ve given my schedule a name of Office Hours with a Min # of Machines On as 1. Just to reiterate, this is the minimum amount of VMs that WILL ALWAYS be powered on. In a Public Cloud scenario this will have a cost implication so plan accordingly!I then set my hours as 8am – 6pm all workdays (Mon – Fri). I’ve then clicked Create.
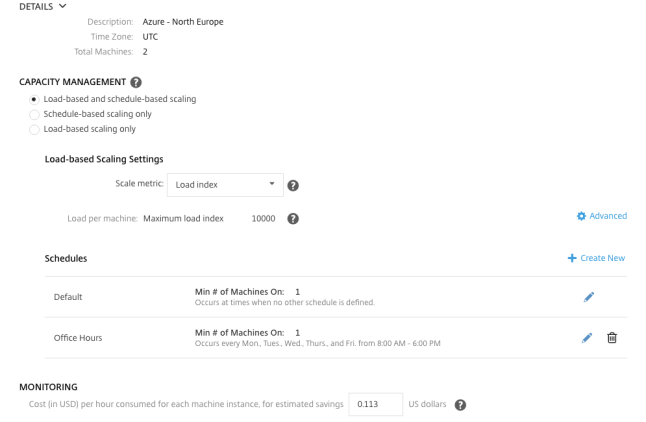
- I now have my own defined capacity and power management policy, based on my environment and pricing so hopefully it should give me the best value as well as the best user experience! Livin’ the dream, eh?
- You’ll see that by default, Smart Scale is disabled.

- Click the button to enable Smart Scale!

- Now click Return to Site Details to see the magic! 🙂

- You’ll now see that we will start gathering data on $$$ saved. Over time this data will build and you’ll be able to sit back in your own glory on how you’ve made cloud workloads cost effective!
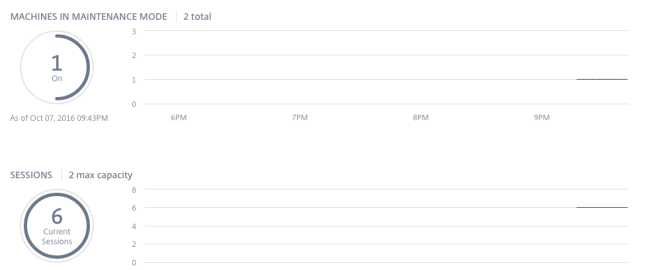
- By hey? What’s happened here? I have a machine in maintenance mode! This is because we’re outside of Office Hours so its placed a VDA in maintenance mode. Now, what I came across was as I had users logged in, then the server stayed up. However, as soon as I logged the users off of the VDA in maintenance mode Smart Scale kicked in the next part… So another recommendation here is to set a policy for Session Idle and Disconnect timeouts.
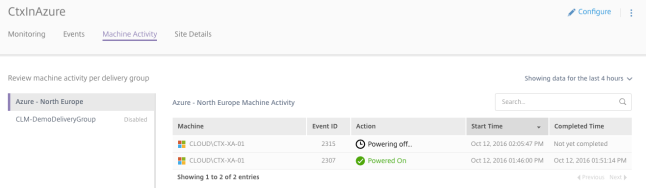
- If you click on the Events tab (next to the Monitoring tab), you’ll see that there’s an event to power off 1 server.

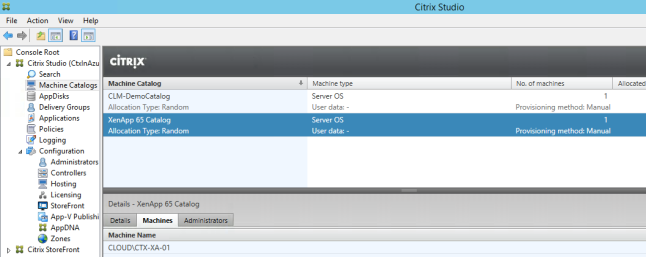
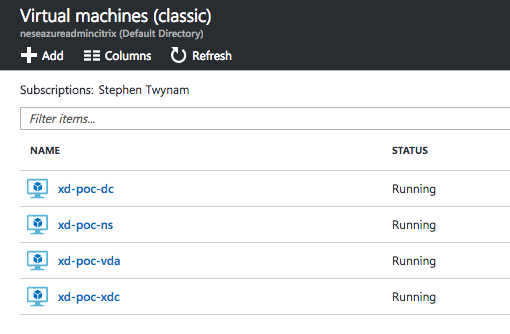
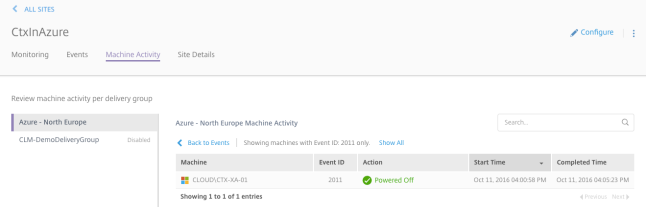
- Clicking on the Machine Activity, you’ll see that CTX-XA-01 was powered off and the start/end time of the action.
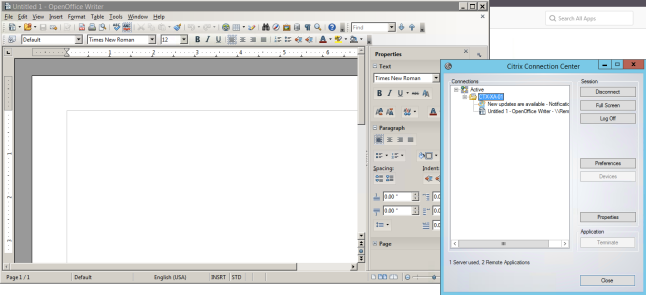
- If I look in Studio, I will see that indeed my VDA is off.

- So that I actually believe I’m not being billed for this VM any more, I’ve gone into my Azure subscription and voila! The VM is Stopped (deallocated) which means I am no longer getting billed for compute costs (the higher costs of running VMs in public clouds). However, please be aware there is still a storage cost involved with having this VM provisioned, it’s just a lot smaller than the compute costs.

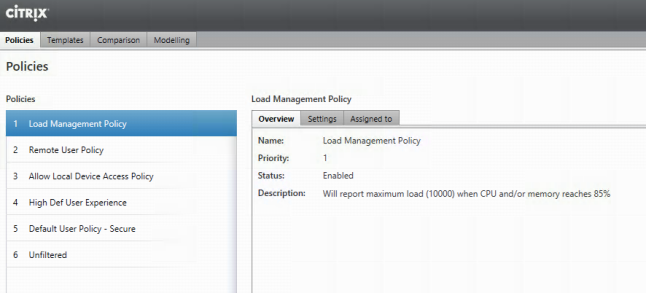
- The next piece of the puzzle was how to get this machine to come back on when it is required – i.e. when the existing powered on servers have reached (or better still are reaching) capacity? Learnt through T&E (trial & error), I found that Smart Scale just uses the load evaluator settings from the Site, which seems logical but I just wanted to make you aware that it doesn’t use anything in Smart Scale per se, you still need to configure a policy based on your needs.I’ve created a simple policy called “Load Management Policy” setting max load when CPU and/or memory reaches 85%. I’ve applied this to my Azure – North Europe Delivery Group. You will need to reboot the VDAs to pick up the setting.
- Now, I’ve logged onto my published Azure Desktop as a test user and generated CPU load by using CPU Stress tool and a memory leak by using Testlimit from SysInternals. Task Manager shows us what’s happening.
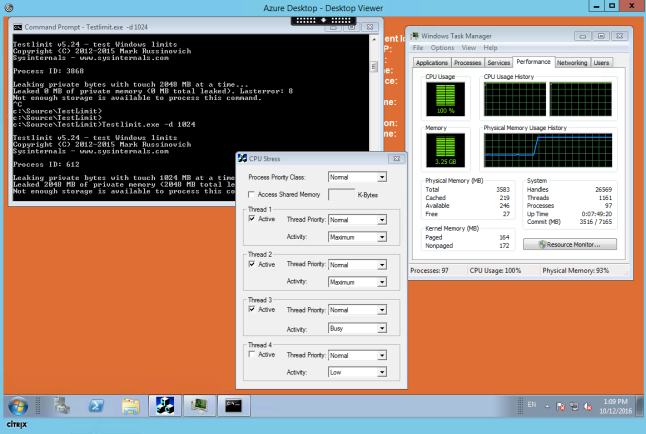
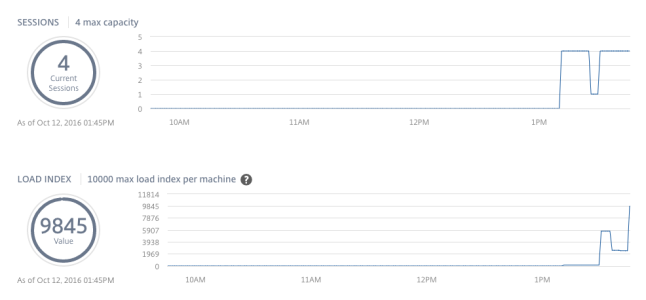
- If we switch back to Smart Scale Monitor screen, we see that we have 4 users logged in (you can see the dip where I rebooted the server :-p) and after a few minutes, the load showing as 9845, so very nearly maxed out.Something I forgot to mention was that there is a buffer (default to 10%) of the thresholds set. So, in my case, once the load index reaches 10000 – 10% = 9000, it will trigger the magic!
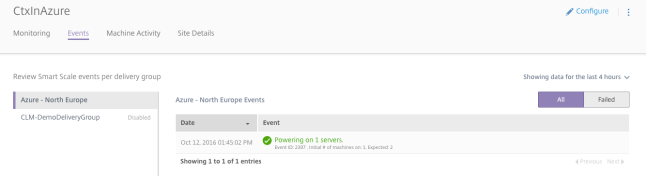
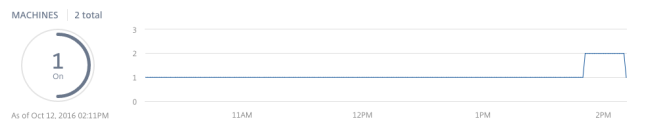
- If the top of the Smart Scale window, if we click on the Events tab, we see that there is an event triggered to power on a server.
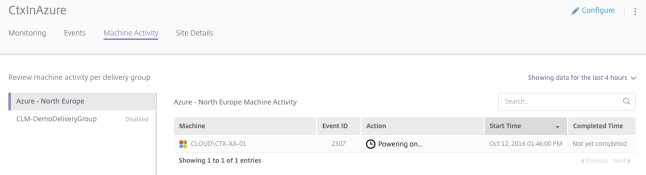
- Clicking on the Machine Activity tab, we can see that CTX-XA-01 is powering on!
- If we flip over to my Azure Subscription, we can see that the VM that was off, is now on! Hazaar!

- Back over in Smart Scale, we now see that there are 2 machines on.
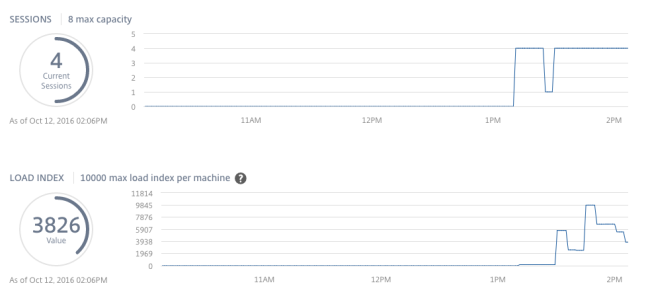
- Looking further down, we see that we still have 4 sessions but the load index has dropped as we have double the resource available.
- What I did next was to stop CPU Stress and TestLimit to drop the overall load. I also haven’t logged in any additional users to the newly powered on VDA. After a few minutes, you see the load drop down.
- If I click on Machine Activity, you’ll see that the CTX-XA-01 which had powered on to be ready for additional capacity is now powering off.
- And after a few minutes you’ll see that the VM has been Stopped (deallocated) meaning I’m no longer getting billed for the compute for this VM.

- Again, in the Monitor tab of Smart Scale you can see that we now only have 1 machine running and our load index has decreased further.
Conclusion
So, I hope you’ve seen the power of Smart Scale and how, through this configuration, you can really help drive value for your cloud-based workloads by configuring the policy to your environment needs. This could be the difference between moving workloads to the cloud or not, so I think it has massive potential.
Here we used just 2 servers, but imagine our example from above of 67 servers and the cost savings per month you could achieve here.
Smart Scale is just one part of the Citrix Cloud offering and a tool of Lifecycle Management. Though these series of blog articles I’m trying to showcase these so that everyone can see the power of the Cloud and how Citrix is at the forefront of Cloud technologies and we take this very seriously and want to provide our customers with the tools to make their move to the cloud, however small or large, a success to help drive better value for their business.
Stay tuned for further Citrix Cloud articles and thank you for reading!